Gardening is one of the most popular pastimes for Americans. And creating a meaningful treatment incorporating a purposeful treatment activity such as Gardening can leave our patients feeling good in spite of their health conditions, which may limit movement (such as arthritis) or cause fatigue. With a few strategies, gardening can be a great reinforcement for patient’s to practice their modifications within the context of a pleasurable and safe activity. According to the AOTA, occupational therapy professionals take a holistic approach and develop strategies to help people do the things they want and need to do no matter their limitations, disability, disease, or condition. Using Gardening as the therapeutic modality can make a treatment very meaningful to a patient.
– See more at: http://www.aota.org/about-occupational-therapy/patients-clients/health-and-wellness/gardening.aspx#sthash.2kWoDUAw.dpuf
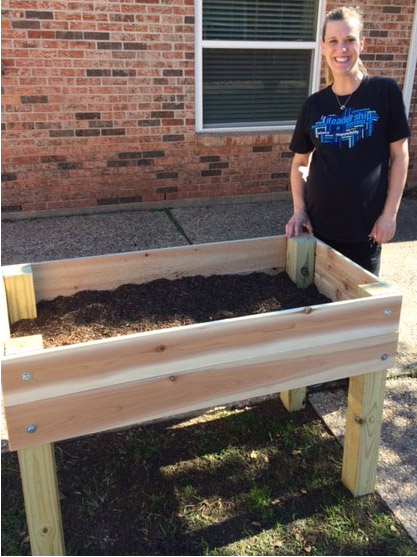
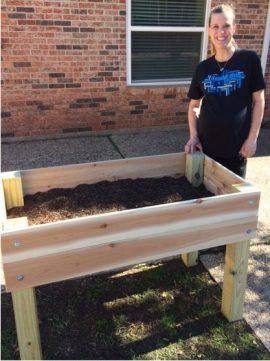
One of the environmental modifications which helps make gardening a more accessible modality for our patients is the Elevated Garden Box, such as the one shown in the picture below. Therapy Resource, Curtis Hoagland, hand-crafted this gardening box for the Occupational Therapy Department at Richland Hills Rehabilitation and Healthcare in Fort Worth. By combining his love of building with wanting to help fill this need for the therapy team, Curtis brought a smile to the face of Jaclynn Stolfus, our OTR at Richland Hills pictured below standing with her newly delivered Elevated Gardening Box.
Shopping List:
2 – 4×4 fir or cedar post (fir is cheaper and lasts nearly as long) I actually used pre-treated lumbar after researching that it is EPA approved for humans and food boxes.
3 – 6×8 cedar boards
3 – 1x3x6 cedar fence pickets (cheaper than cedar board)
1 – roll of 1/4″ hardware cloth 50×24″ (make sure to get hardware cloth with 1/4″ holes, 1/2 inch is too large and all your dirt will fall through)
16 – 3/8 inch x 3 inch lag screws
16 – 3/8 inch flat washers
Box of 1 1/4 inch exterior wood screws
Cut List:
Legs: cut the 4×4’s into 4 – 32 inch legs
Sides: cut 2 of the 6×8 cedar boards into 4 – 48 inch lengths
Ends: Cut 1 of the 6×8 cedar boards into 4 – 24 inch lengths
Bottom slats: cut the 3 – 1x3x6 into 6 24 inch lengths
Bottom hardware cloth: cut the hardware cloth into a 24×50 inch rectangle.
Pre-drill all holes to attach ends, sides and bottom support slats
Attach the 24” ends to the 4×4 post using the 3/8 x 3 inch lag screws (be sure to add a washer to the lag screw prior to driving it into the post). Allow the ends to extend beyond each 4×4 post by 5/8 of inch. This will allow the sides to butt up against the ends and keep the width of the box 24 inches (important to ensure the hardware cloth fits)
Attach the 48” sides (pre-drill holes) using remaining lag screws and washers.
To prevent cracking of the side and end boards, only drive the lag screws in about 2.5 inches and then hand tighten with a 9/16 inch socket until snug.
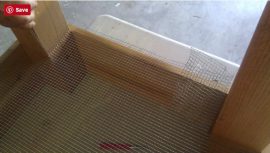
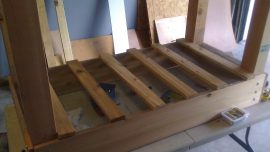
Cut the hardware cloth to about 50 inches long. Below is a picture showing how to wrap it around the legs. I tucked mine in on the inside of the end boards. Once it is aligned to the edges and tucked in on the ends, use ½ inch staples to secure it to the box on the post, the end board and the side boards (takes lots of staples).
Align the 1x3x24 inch cedar slats to the bottom of the box (equal distance apart) and fasten to the bottom of the sides using the 1 ¼ inch exterior wood screws (Pre-drill holes through the slats and sides to prevent cracking).
Alternate option (which I did): Add a 1×2 inch furring strip to the inside of each side about 5/8 of an inch from the bottom. Attach the hardware cloth to these furring strips and then align and attach the 1x3x24 inch cedar slats to the furring strips instead of the sides. This way the bottom slats are not visible on the finished project and anchor the hardware cloth more securely.
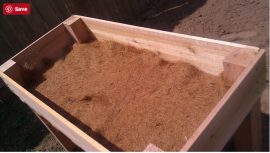
Lightly sand all edges. And then add a layer of compost or coconut cloth on the inside bottom of the box and then fill with potting soil or other planting soil of choice. The compost / coconut cloth helps prevent the planting soil from sifting through the bottom hardware cloth.